Electropolis: Mixing & EQ Bootcamp for E-Music Noobs
posted in: Features
 Mixing and equalizing can seem like an intimidating task, however you don’t need to be a professional sound engineer to make a very listenable track as a producer. In the real world, many songwriters send their music on to get mixed by fresh ears all the time. Part of the reason is to simply have the track mixed from the audience’s point of view, the other reason is that you just spent twenty-four to forty-eight straight hours of recording it and your ears are about to throw up. Therefore, if you’re merely a composer, then you probably don’t need to be 100% up to date on mixing and equalizing. You are meant to drain your creative energy on the best part of music”making and performing it. However, it’s good to know some basics or maybe even establish a process for rough mixes. Doing so will allow you to go ahead and perform/publicize a new song your excited to share. Let’s get started!
Overall, this is a very basic and proven process for mixing and equalizing a rough mix. Now before we begin, take into consideration that this mixing process is solely meant for mixing digital electronic music. However, whether you love or hate Propellerhead, their Web site offers free mixing and EQ techniques for recording audio vocals, guitar, bass and drums. Although these tutorials are meant to help Record users, 90% of the information is generic enough to apply to most mixing and EQ setups. Since it’s a popular DAW, we’ll be using Reason 6 to reference its mixing board for visual stimulation.
What will you need?
- A fully recorded song
- A pair of good monitors and headphones
- A digital audio workstation (DAW) with a generic mixing board as seen within Reason.
Important Things to Know:
Before getting started, let me point out that mixing and equalizing will not make recording errors go away, so make sure you have a solid recording that you’re comfortable with. Also, Click here to get an in-depth education regarding all units of measure discussed if you are unsure of their definitions (e.g. kHz, Hz, dB, etc.). In addition, please do yourself a favor and read this entire article before messing with your current mix as somethings discussed may be unnecessary. FYI: You don’t need to EQ every single track and shouldn’t EQ a track unless it’s absolutely necessary. If your dealing with an important tune, make sure you save the song as a different file name so if something goes wrong you have the original mix. For the most part, this tutorial is simply meant to demonstration the sonic qualities of the techniques and parameters discussed.
Headphones & Monitors:
During the panning process, we’ll be using headphones. However, try to avoid using them during the mixing & EQ stages unless you don’t have a pair of studio monitors. Sometimes headphones can give you a flawed perspective and make the mix sound better than it actually is. Although there are people that mix well with headphones, doing so requires practice and a good sense of mixing through them. For beginners, it’s best to avoid mixing & EQing with headphones all together”except for panning.
The Process:
Since you were probably using the faders to adjust levels during recording, let’s go ahead and bring those back to the default 0 dB. Matter of fact, bring the entire mixing board back to its default settings because we’re going to start the mix by adjusting the gain levels.
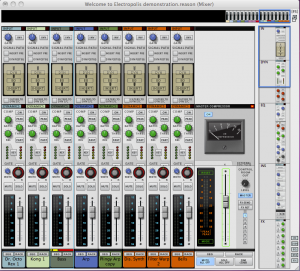
Figure 1: Default Settings
As you can see, the gain controls are usually located at the top of most mixing boards. After locating them, play the song and adjust the gain so that each track’s decibel level is about -7 dB. (Remember, we’re talking about recording digital synthesizers and electronic instruments”straight audio gain from an analog device or guitar, for example, is usually adjusted via sound card.) We found that the quickest way to do this is by listening to a loop that incorporates all or most of the tracks. Adjust the gain levels from its playback. After, locate the loudest part of the song where you’d be using an effect such as an envelope filter, play the song and make sure nothing is clipping. As you can see from Figure 2, everything except the Master Volume should be in the green. However, always use your ears to find the perfect spot because slight clipping may be an artistic attribute you wish to include. Also, this basic guideline of adjusting the gain to -7 dB isn’t a golden rule, but it got the job done for our rough mix. (Note: If your Master Volume is ever in red and the song’s volume is way too loud, this means the gain levels of your devices and/or effects are to high. If so, lower them and restart.)
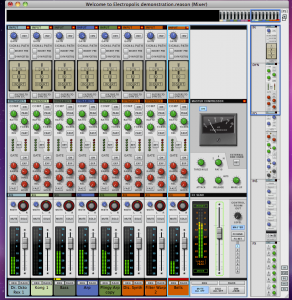
Figure 2: Gain Adjustment
After you’ve adjusted the gain input via mixing board to the target spot, take out your headphones because we’re going to do a rough pan. FYI: You shouldn’t have touched those faders yet and won’t need to touch them for a while.
Once you’ve made sure your faders look straight out of the box and untouched, pan the individual tracks to their desired positions either center, left or right. Position each instrument to accompany the loudest desired track, or tracks, and determine what point in space the sound would be coming from.
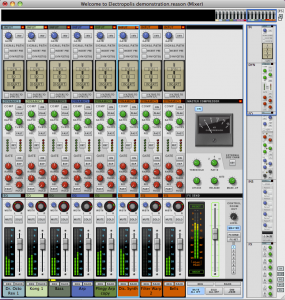
Figure 3: Panning
Once you’re comfortable with the panning, go to the Low & High Pass Filters. Turn on the Low Pass Filters (LPF) to remove hiss from a particular track or emphasize a low-frequency sound like a kick drum. If you want to reduce rumble or low frequency hum, use the High Pass Filter (HPF). For example, if you’re hearing some treble distortion from a bass synth that’s non-tonal and the track & device aren’t clipping, conservatively use the LPF to remove the unwanted noise. Start by turning the filter on, this may be enough to reduce/remove the unwanted distortion. If still audible, sweep across the frequency range by turning the LPF parameter (denoted as kHZ) from left to right until the unwanted noise is removed. Do this gradually and compare any altered frequencies to the song as a whole.
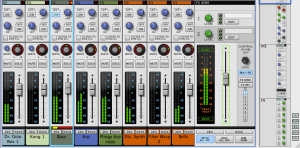
Figure 4: Adjusting Low & High Pass Filters
Once you’re done using the Low & High Pass Filters, let’s move on to the High and Low Shelving EQ. Before beginning, make sure you only touch these controls if you’re confident the instrument was recorded in the correct register with the ideal tone you want. For example, if your bass was recorded at C2 or lower”there’s no distortion or clipping”but the tone still contains some treble, then use the Low Shelving EQ (LF) to add bass. In contrast, if you’ve separated the drum’s highs and lows into individual tracks, you can use the High Shelving EQ (HF) to increase the treble if the cymbals sound too bassy. (FYI: With a good recording, it’s pretty rare to touch these controls.) However, if you do decide to use them, gradually sweep the filter across the frequency from left to right, and find the ideal spot. (The Low Shelving EQ’s frequency is denoted as Hz and the High Shelving EQ’s is kHZ.) After, experiment with slightly raising and lowering the filter’s gain (denoted as dB), but if possible try to avoid increasing the filter’s gain.
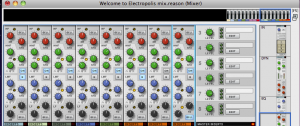
Figure 5: Low & High Shelving and Parametric EQ
After you’ve decided whether use the Shelving EQs or not, you can move down to the Parametric EQ. Many mixing boards contain a Parametric EQ for both low and high frequencies. If you’re equalizing a low-end frequency such as a bass, use the low-frequency parametric EQ”and vice versa for highs such as as guitar.
Before starting, let’s get a stupid-basic understanding of the Parametric EQ’s parameters for a second. The Q parameter controls the bandwidth of the wave, making it narrower or wider. The dB moves the wave up and down, increasing or decreasing its gain (volume) and the kHZ moves the wave’s frequency low and high.
Once you have some understanding of Parametric EQ’s parameters, let’s try to locate any muddiness within the song. Muddiness usually occurs when two or more instruments are coinciding each other within the same frequency range. Normally, you should be aware of using too many instruments within the same frequency range during the recording and compositional process. However, if you simply can’t do without, use the Parametric EQ to reduce muddiness and hear each of them more clearly.
Before touching anything, make sure you’re confidently hearing a crappy-sounding clashing of instruments where the notes are no longer distinct and clear. If you do hear this, then it’s safe to use the Parametric EQ on the instruments creating the muddiness. For example, let’s say a horn and a guitar are playing identical parts simultaneously, creating increased muddiness. First, select which instrument you want to stand out more, let’s say the horn, and make it’s bandwidth (denoted as Q) pretty sharp by turning the parameter to the right.. Then, sweep the horn’s frequency (denoted as kHZ) from low to high by turning the parameter from left to right. While doing so, listen for the clearest point on the frequency range. After locating the target spot, increase the EQ’s gain from low to high, while listening for the best level (denoted as dB). If the instrument’s volume increased or decreased significantly, simply increase or decrease the gain of the track to bring it back to its original volume level of -7 dB. Then, as always, check your alternations to the song as a whole.
Okay, by this point you’ve essentially equalized a bunch of muddiness out of the mix while keeping each track at a consistent volume level”congrats! Now, you can go all out with you’re fader and adjust each track to whatever volume level you want.
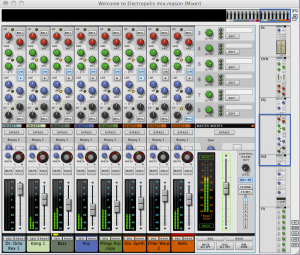
Figure 6: Fading
Once you’re comfortable with the mix, go head and glue all these alterations to new audio tracks by bouncing them. After you’ve bounced all the tracks, mute the non-bounced tracks via mixing board, re-pan them and re-adjust the volume level via faders. From here, it’s up to you to add additional effects such as insert FX or compression.
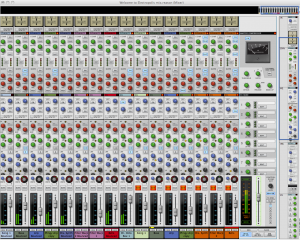
Figure 7: Final Bounce, Fade, and Pan w/ Added Compression and EQ
Remember, there are 1,000,000 different ways to mix. However, this is the process used for the end of the month demonstration song Electropolis provides, well, at the end of every month. For January, this post will be up next week so stay tuned. Essentially, it’ll incorporate every topic discussed in January such as the use of arpeggiators, various ideas for dynamics and phrasing, and the EQ and mixing process we just did. The idea is to demonstrate what you can do with the information provided by Electropolis in hopes that you’ll incorporate it into your own stuff.
As always,
Keep it groovin’!
More like this:
