Tune Up: Home Studio Accessories
posted in: Features • Reviews & Playlists
 So you’ve got your studio equipment: that shiny new audio interface, your rack processing units, your monitors, mixers, guitars”everything. Your home studio is complete. Well, almost. This week I’ll talk briefly about some of the accessories I recommend to help you keep your studio or rehearsal space as high-quality as possible. They may seem small and unimportant, but they will all improve your music and productivity.
Microphone Accessories:

There are a couple of things I always recommend having around to make sure your mic’s sound awesome while recording. While many mic’s come with cables and clips, they often don’t come with some of the less-obvious accessories. I always have a couple of pop filters so I can make sure my microphones don’t pick up any of those P pops. In addition, I usually have some windscreens designed for dynamic microphones so that there isn’t any wind noise when I capture those great sounds. These may seem minuscule, but they make a big difference. Your condenser mic’s will thank you.
If you read my post about cables, you know how important it is to shop at the right place and to get the right cables. In this article, I would recommend simply making sure you have a lot of cables around”specifically several XLR and short patch cables. You never know how many microphones you need set up simultaneously and how many different types of patching you’ll need to do. The bottom line is you don’t want a lack of cables to stop you from achieving a certain studio setup or configuration.
Sound Proofing:
 Sound proofing is the single easiest way to get the clearest sound out of your mic/audio interface. When you’ve taken the time to buy decent equipment that’s been well researched, the number one cause of poor results is almost always room noise. For this reason, I always have a bunch of different soundproofing materials handy. First on the list obviously soundproofing foam as a permanent fixture in your studio. This foam absorbs vibrations and eliminates a lot of inherent room echo and reverberation. It allows you to get a completely dry sound. Positioning this foam on each wall in occasional areas as well as in corners and grooves will help to make sure that you have complete control over the reverb you assign to your raw audio.
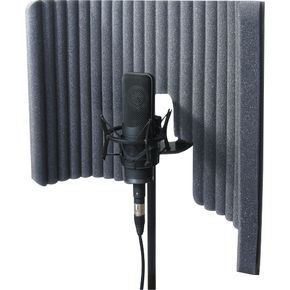
Additionally, it’s important that you have foam, boards and barriers for further middle-of-the-room isolation. The most important studio sounds to isolate are very often drums and vocals; you need to form a makeshift isolation chamber around these performers. You can purchase small, specially designed barriers to be placed behind your condenser mic so that it isolates the sound, not allowing any reverberation to escape behind the microphone. You can also purchase larger versions of these barriers designed to create a similar isolation for drum sets.
While you can buy any of these soundproofing materials at a music store or online retailer, I recommend a little ingenuity to save some money. You can purchase eggcrate or flat-cut foam at any local hardware store and cut it yourself. A friend of mine even created some very effective drum isolation barriers out of plastic palettes and standard insulation. While they weren’t very pretty, they did the trick.
Microphone accessories and sound proofing are very basic studio accessories that you might not have thought of. There are many other accessories that deal specifically with instruments and live performances, and I’ll talk about those in a later post. This post, however, was meant to encourage you to make sure you are stocked with the basic tools to make you home studio sound as good as possible.
